


Vibrato circuit
#vibrato
#guitar
#audio effect
#electronics
#musical instrument
#pitch modulation
#1950s
#Popular Electronics
#DIY

Description: RF Cafe visitor Jim L. requested that this "Build Your Own Vibrato" article from the December 1957 edition of Popular Electronics be posted. The tagline states, "Make like Elvis with an electronic throbbing guitar." Vibrato, for those unfamiliar with music, refers to the "wa-wa" sound of an instrument that smoothly wavers in pitch around a central note. This circuit is designed for use with electric guitars, although acoustic stringed instruments like violins and cellos also utilize the vibrato effect by rocking the finger along the string. In typical 1950s fashion, the project employs point-to-point wiring instead of a printed circuit board. If an electronic musical instrument or a conventional instrument equipped with a pickup is available, the vibrato described in this article may be desirable. A vibrato device continuously and automatically varies the amplitude of music at a low speed, typically between 6 to 15 times per second. For example, it produces a soul-stirring throbbing effect, especially in the bass notes of a pipe organ.
Construction details indicate that layout and wiring are not particularly critical. For convenience, a turret socket was used to mount the oscillator tube (V1) and its components, although a standard socket and tie points can also be utilized. Miniature coaxial jacks, similar to those found on most hi-fi amplifiers, are used for output (J1) and input (J2) connections. If different connections are required, any conventional type of jack may be employed. It is important to keep power supply components well separated from oscillator and modulator components to prevent hum pickup, and to orient tube sockets for reasonably short lead connections. The 6.3-volt heater leads should be dressed snugly against the chassis and kept well separated from grid terminals and leads. A miniature amplifier foundation (Bud No. CA-1754) serves as the chassis, which measures 5" x 7" x 2". The overall height with the grille cover is 6". The chassis finish is black crackle, but it can be repainted with plastic spray in a different color if desired. In some cases, the vibrato circuit may be mounted on the same chassis as the musical instrument amplifier, provided there is sufficient space and the amplifier's power transformer can supply the additional 0.6-ampere filament current required by the two vibrato circuit tubes. The plate voltage requirement is approximately 175 volts.
Top and bottom views of the vibrato chassis illustrate the simplicity of the construction. To ensure tight connections, twist the lugs of the can-type filter capacitors to their metal mounting plates. The schematic and pictorial representations demonstrate the vibrato's construction. If the amplifier produces a "thump" at the vibrato frequency, a lower value capacitor for C7 may resolve the issue. A block diagram shows the correct interconnection of the three basic components of the revised setup. Shielded microphone cable should be used between units to prevent electrostatic hum pickup. If excessive 60-cycle hum is present, reversing the line plug of either the amplifier or the vibrato unit may help.
The vibrato is designed to be inserted between the musical instrument and its amplifier. To use it, simply unplug the musical instrument from its amplifier and connect it to the input jack of the vibrato. Then, connect a jumper cable from the output jack of the vibrato to the amplifier.
The vibrato circuit provides musicians with the ability to create a rich, throbbing sound that enhances the expressiveness of their performance. By employing simple electronic components and straightforward assembly techniques, this project allows for customization and integration with various musical setups. The careful consideration of layout and component placement ensures optimal performance while minimizing noise interference. This vibrato circuit exemplifies the innovative spirit of the 1950s electronics era, offering a unique tool for musicians seeking to expand their sonic palette.RF Cafe visitor Jim L. requested that I post this Build Your Own Vibrato article from the December 1957 edition of Popular Electronics. "Make like Elvis with an `electronic` throbbing guitar, " is the pitch line. Vibrato, for the non-musically inclined, is the `wa-wa` sound of an instrument as it smoothly wavers in pitch about a central note.
This circuit is for use with an electric guitar, but acoustical stringed instruments like the violin and cello are routinely played with vibrato effect by rocking the finger up and down the length of the string. In typical 1950s style, the project is built with point-to-point wiring rather than using a printed circuit board.
If you own an electronic musical instrument or a conventional instrument equipped with a pickup, chances are that the vibrato described in this article is just what you`ve always wanted. A vibrato is a device which continuously and automatically varies the amplitude of the music at a low rate of speed, usually somewhere in the range of 6 to 15 times per second.
For instance, it is a vibrato which produces the soul-stirring throbbing, especially in the bass notes, of a pipe organ. Construction. Layout and wiring are not especially critical. For convenience a turret socket was used to mount the oscillator tube, V1, and its components, but a standard socket and tie points will do as well.
Miniature coaxial jacks, of the type found on most hi-fi amplifiers, were used at J1 and J2 for the output and input connections, respectively. If your setup requires something different, any conventional type of jack may be employed. Keep the power supply components well separated from the oscillator and modulator components, to prevent hum pickup - and orient the tube sockets for reasonably short lead connections.
Make sure that the 6. 3-volt heater leads are dressed snugly against the chassis and that they are well separated from grid terminals and leads. A miniature amplifier foundation (Bud No. CA-1754) was used for a chassis (any other setup of suitable size can be substituted). The Bud chassis measures 5" x 7" X 2", and its over-all height with the grille cover in place is 6". The finish is black crackle - but if some other color appeals to you, it`s a simple matter to go over the chassis with a couple of coats of plastic spray.
In some instances, it may be possible to mount the vibrato circuit proper on the same chassis with the musical instrument amplifier. This can be done provided that there is room, and that the power transformer in the amplifier can supply the 0.
6-ampere additional filament current demanded by the two vibrato circuit tubes. The plate voltage requirement is approximately 175 volts. Top and bottom views of the vibrato chassis are seen at left and below. Twist the lugs of the can-type filter capacitors so that the filters are tight to their metal mounting plates. Schematic and pictorial at left show the simplicity of the vibrato construction. If your amplifier tends to "thump" at vibrato frequency, try a lower value capacitor for C7. Block diagram shows correct interconnection of the three basic components of the revised setup. Use shielded microphone cable between units to prevent electrostatic hum pickup. If there seems to be excessive 60-cycle hum present, try reversing line plug of either amplifier or vibrato unit.
Hooking It Up. The vibrato is intended to be inserted or connected between the musical instrument and its amplifier. All you have to do to use it is unplug your musical instrument from its amplifier and plug it into the input jack of the vibrato.
Then connect a jumper cable of conve
Construction details indicate that layout and wiring are not particularly critical. For convenience, a turret socket was used to mount the oscillator tube (V1) and its components, although a standard socket and tie points can also be utilized. Miniature coaxial jacks, similar to those found on most hi-fi amplifiers, are used for output (J1) and input (J2) connections. If different connections are required, any conventional type of jack may be employed. It is important to keep power supply components well separated from oscillator and modulator components to prevent hum pickup, and to orient tube sockets for reasonably short lead connections. The 6.3-volt heater leads should be dressed snugly against the chassis and kept well separated from grid terminals and leads. A miniature amplifier foundation (Bud No. CA-1754) serves as the chassis, which measures 5" x 7" x 2". The overall height with the grille cover is 6". The chassis finish is black crackle, but it can be repainted with plastic spray in a different color if desired. In some cases, the vibrato circuit may be mounted on the same chassis as the musical instrument amplifier, provided there is sufficient space and the amplifier's power transformer can supply the additional 0.6-ampere filament current required by the two vibrato circuit tubes. The plate voltage requirement is approximately 175 volts.
Top and bottom views of the vibrato chassis illustrate the simplicity of the construction. To ensure tight connections, twist the lugs of the can-type filter capacitors to their metal mounting plates. The schematic and pictorial representations demonstrate the vibrato's construction. If the amplifier produces a "thump" at the vibrato frequency, a lower value capacitor for C7 may resolve the issue. A block diagram shows the correct interconnection of the three basic components of the revised setup. Shielded microphone cable should be used between units to prevent electrostatic hum pickup. If excessive 60-cycle hum is present, reversing the line plug of either the amplifier or the vibrato unit may help.
The vibrato is designed to be inserted between the musical instrument and its amplifier. To use it, simply unplug the musical instrument from its amplifier and connect it to the input jack of the vibrato. Then, connect a jumper cable from the output jack of the vibrato to the amplifier.
The vibrato circuit provides musicians with the ability to create a rich, throbbing sound that enhances the expressiveness of their performance. By employing simple electronic components and straightforward assembly techniques, this project allows for customization and integration with various musical setups. The careful consideration of layout and component placement ensures optimal performance while minimizing noise interference. This vibrato circuit exemplifies the innovative spirit of the 1950s electronics era, offering a unique tool for musicians seeking to expand their sonic palette.RF Cafe visitor Jim L. requested that I post this Build Your Own Vibrato article from the December 1957 edition of Popular Electronics. "Make like Elvis with an `electronic` throbbing guitar, " is the pitch line. Vibrato, for the non-musically inclined, is the `wa-wa` sound of an instrument as it smoothly wavers in pitch about a central note.
This circuit is for use with an electric guitar, but acoustical stringed instruments like the violin and cello are routinely played with vibrato effect by rocking the finger up and down the length of the string. In typical 1950s style, the project is built with point-to-point wiring rather than using a printed circuit board.
If you own an electronic musical instrument or a conventional instrument equipped with a pickup, chances are that the vibrato described in this article is just what you`ve always wanted. A vibrato is a device which continuously and automatically varies the amplitude of the music at a low rate of speed, usually somewhere in the range of 6 to 15 times per second.
For instance, it is a vibrato which produces the soul-stirring throbbing, especially in the bass notes, of a pipe organ. Construction. Layout and wiring are not especially critical. For convenience a turret socket was used to mount the oscillator tube, V1, and its components, but a standard socket and tie points will do as well.
Miniature coaxial jacks, of the type found on most hi-fi amplifiers, were used at J1 and J2 for the output and input connections, respectively. If your setup requires something different, any conventional type of jack may be employed. Keep the power supply components well separated from the oscillator and modulator components, to prevent hum pickup - and orient the tube sockets for reasonably short lead connections.
Make sure that the 6. 3-volt heater leads are dressed snugly against the chassis and that they are well separated from grid terminals and leads. A miniature amplifier foundation (Bud No. CA-1754) was used for a chassis (any other setup of suitable size can be substituted). The Bud chassis measures 5" x 7" X 2", and its over-all height with the grille cover in place is 6". The finish is black crackle - but if some other color appeals to you, it`s a simple matter to go over the chassis with a couple of coats of plastic spray.
In some instances, it may be possible to mount the vibrato circuit proper on the same chassis with the musical instrument amplifier. This can be done provided that there is room, and that the power transformer in the amplifier can supply the 0.
6-ampere additional filament current demanded by the two vibrato circuit tubes. The plate voltage requirement is approximately 175 volts. Top and bottom views of the vibrato chassis are seen at left and below. Twist the lugs of the can-type filter capacitors so that the filters are tight to their metal mounting plates. Schematic and pictorial at left show the simplicity of the vibrato construction. If your amplifier tends to "thump" at vibrato frequency, try a lower value capacitor for C7. Block diagram shows correct interconnection of the three basic components of the revised setup. Use shielded microphone cable between units to prevent electrostatic hum pickup. If there seems to be excessive 60-cycle hum present, try reversing line plug of either amplifier or vibrato unit.
Hooking It Up. The vibrato is intended to be inserted or connected between the musical instrument and its amplifier. All you have to do to use it is unplug your musical instrument from its amplifier and plug it into the input jack of the vibrato.
Then connect a jumper cable of conve

ELECTRICAL ENGINEERING TECHNOLOGY PROGRAM
The objective of this project is to develop a multi-effect guitar processor capable of altering the tonal characteristics of a guitar. This device aims to provide a wide range of unique sounds, enhancing the entertainment value for users. The evolution...

Guitar treble boost
Q1 is connected as an emitter follower to provide a high input impedance for the guitar. Capacitor C2, having a relatively low capacitance, filters out most of the bass frequencies, while C3 in conjunction with variable resistor RV1 functions as...

69 SFPR Schematic Telecaster Guitar
A 1969 Princeton Reverb amplifier is identified as utilizing the AA764 circuit design. Various online resources provide schematics for Fender amplifiers.
The Princeton Reverb amplifier, particularly the model from 1969, is renowned for its warm tone and versatile sound characteristics, making...

Rock Face effect for guitars
I've taken the classic Fuzz Face circuit and added optical temperature compensation. This ensures that the output stage is biased at half the supply voltage regardless of variations in the transistors, particularly those caused by temperature. Tweaks: Obviously, one could...

Guitars Modulator
Even with the controls set to their maximum position, there will always be some signal leakage, resulting in a loss of tone. With Module 3, engaging the bypass switch to 'Solo' disconnects the tone and volume controls from the circuit,...

Guitar Effect Bypass Circuit
Observing my Boss pedals and how they were switched on and off I figured there must be more to it. It took me only about 4 hours to design and test this circuit. It works very well and I’m really...

Pro Co Rat Input & Output Buffers Guitar
In certain versions of the circuit, the input buffer may be completely absent, while in other versions, the buffer transistors exhibit different biasing configurations or utilize different transistors altogether. Some designs contain significant errors, including biasing issues and incorrect transistor...
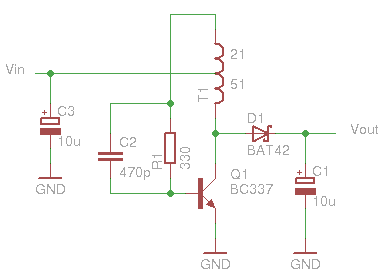
Glue stck torch
This project, developed around 2005, involves constructing a torch using a glue stick, which conveniently accommodates an AA battery within its plastic casing. To create a functional battery holder, contacts for both the positive and negative connections are necessary. The...
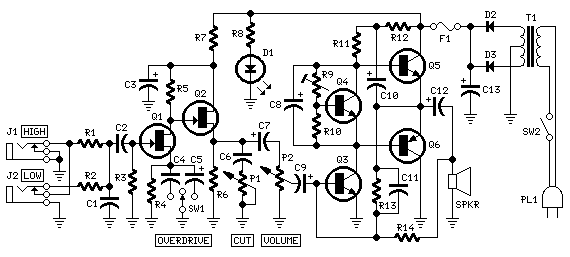
Guitar Amplifier
The aim of this design was to reproduce a Combo amplifier of the type very common in the sixties and the seventies of the past century. It is well suited as a guitar amplifier but it will do a good...