


Coil Driver/launcher circuit
#coil driver
#launcher
#ferromagnetic
#projectile
#pulse power
#electromagnetic
#DIY
#hobby
#experimental

Description: This is a fun and non-dangerous project for those people who like to throw projectiles magnetically. It simply works by placing a ferromagnetic projectile at one end of a coil and pulsing some power in it. The trick is to switch off power when the projectile is at the middle of the coil; there are some ways to do it, but it isn't important now. The second trick is to use a coil as close as possible to the projectile to maximize coupling, and the third is to avoid saturation, which means keeping the current not too high. I've been messing with coil launchers for a year. The first model was a straw with some wire wrapped on it and an electrolytic capacitor (200V) pulsed in it. Lots of sparks and metal flying, but was able to shoot a nail across my room. More: I started experimentation wrapping wire on glass and using more electrolytics charged by mains power, very bulky and disappointing (100J of energy where only able to blast through 2 sheets). After holidays, I started more mature experimentation employing SCRs (solid-state switching), photoflash electrolytics, and optical sensors, and built a bi-coil launcher (2 stages), complicated but powerful (blasted through a can), but the timing is critical, so transient simulations were a must (and an L-C-R meter). The next launcher will be MOSFET-switched with 3 coils and optical sensors, but I don't have the funds/parts yet to build such an expensive launcher, but I already designed plans and models. For now, I decided to build a small funny coil launcher using one SCR and coil on glass. Using my LCR meter and Multisim simulator, I designed it for max efficiency.
For first, you need some disposable camera flashes, so try to search at your local photo shop. You need 4 or more of them. Desolder the caps and collect them. They have ratings of 330V 120-160uF and can survive pulses up to 300A (each), or even dead shorts (but don't do it because it is quite a bang). Paralleling them reduces the ESR (internal resistance) and ESL and increases peak current capability. I used 4 of them, and my coil launcher has a pulse current of 400A (about 100A for cap). The more caps, the more energy. Concerning the charging circuit, use the largest you got, and try to use more batteries than originally if you want a fast charge. I used a max Kodak disposable flash, and it works fine with 4 1.5V batteries (originally it was designed to use one) and doesn't burn out. The caps were soldered on a small breadboard with parallel tracks made with lots of solder (otherwise the solder will blow).
The coil was made with 200 turns distributed on 10 layers (remember to insulate each other) of insulated magnet wire with 1mm diameter on a glass pipe with 6mm external diameter and 3mm internal diameter. Also, plastic works good as a barrel but must be hard; metals must be NON-Ferromagnetic and must have a cut along the barrel length (to limit eddy currents).
The resistance is 350 milliohm, and inductance is 165 uH (according to my LCR meter), giving a pulse length of 1 ms (Multisim simulation) and peak current of 400A, limited by inductance. Using more caps would increase pulse current because the resistance is low and the current is inductance-limited, so it is advised to use only 4 caps (maximum 5).
Concerning the switching, 2N6509 SCRs (Onsemi) (25A 800V) are used, which have a pulse rating of 300A x 6 ms (450 x 1ms). They are very good, cheap, and small and require a small signal to drive. A reverse diode was added to the caps because the simulations showed a peak reverse voltage in capacitors (it is an undamped LCR circuit) that could damage them. This solution limits reverse charging (to -0.5 V to 1V) and makes the current decay better, reducing the such-back effect. The projectile is a 2.5 mm diameter nail with the same length as the winding, but a longer pulse may slow down the projectile instead of speeding it up, so it is advised to keep them only 4. The simulations indicate a high potential for the device, with enough force to potentially break a window, though precautions should be taken to ensure safety during operation.
The schematic design should include the following components:
1. **Capacitor Bank**: Four parallel-connected electrolytic capacitors rated at 330V and 120-160uF.
2. **Coil**: A coil constructed with 200 turns of 1mm insulated magnet wire, wound around a glass pipe, ensuring insulation between layers.
3. **SCR**: A 2N6509 SCR for switching, with appropriate heat sinking to manage thermal dissipation.
4. **Diode**: A reverse diode across the capacitor bank to protect against reverse voltage.
5. **Power Source**: A battery pack capable of providing sufficient voltage and current for rapid charging of the capacitor bank.
The operational principle revolves around charging the capacitors quickly and discharging them through the coil to launch the projectile. The timing of the SCR's gating signal is critical, necessitating precise control to ensure maximum efficiency and safety. The system should be tested in a controlled environment, with safety measures in place to handle the high currents and potential hazards associated with magnetic projectile launching.This is a fun and non-dangeros project for those people who like to throw projectiles magnetically. It simply works by placing a ferromagnetic projectile at one end of a coil and pulsing some power in it. The trick is to switch off power when the projectile is at the middle of the coil, there are some ways to do it but it isn't important now.
The second trick is to use a coil as close as possible to projectile to waximize coupling and the third to avoid saturation, that means keeping the current not to high. I've been messing with coil launchers for a year. The first model was a straw with some wire wrapped on it and an electrolityc capacitor (200V) pulsed in it.
Lots of sparks and metal flying but was able to shoot a nail accross my room. I started esperimentation wrapping wire on glass and using more litycs charged by mains power, very bulky and disappointing (100J of energy where only able to blast through 2 sheets). After holydays I started more mature experimentation employing SCRs (solid state switching) photoflash electrolytics and optical sensors, and built a bi-coil launcher (2 stages), complicated but poweful ( blasted through a can) but the timing is critical, so transient simulations were a must (and a L-C-R meter).
The next launcher will be mosfet-switched with 3 coils and optical sensors, but i don't have the funds/parts yet to build such an expensive launcher, but already designed plans and models. For now i decided to build a small funny coil launcher using one scr and coil on glass. Using my LCR meter and multisim simulator i designed it for max efficiency. For first you need some disposable camera flashes, so try to search at your local photo shop. You need 4 of more of them. Desolder the caps and collect them. They have ratings of 330V 120-160uF and can survive pulses up to 300A (each), or even dead shorts (but don't do it because it is quite a bang).
Paralleling them reduces the ESR (internal resistance) and ESL and highers peak current capability. I used 4 of them and my coil launcher has a pulse current of 400A (about 100A for cap). The more caps , the more energy Concerning the charging circuit, use the largest you got, and try to use more batteries than originally if you want a fast charge. I used a max kodak disposable flash and it works fire with 4 1.5V batteries (originally it was designed to use one) and doesn't burn out.
The caps where soldered on a small breadboard with parallel tracks made with lots of solder (otherwise the solder will blow). The coil was made with 200 turns distributed on 10 layers (rembember to insulate eachover) of insulated magnet wire with 1mm diameter on a glass pipe with 6 mm external diameter and 3 mm internal diameter.
Also plastic works good as barrel but must be hard , metals must be NON-Ferromagnetic and must have a cut along the barrel lenght (to limit eddy currents). The resistance is 350 milliohm and inductance is 165 uH (according to my LCR meter) giving a pulse lenght of 1 ms (Multisim simulation) and peak current of 400A, limited by inductance.
Using more caps would increase pulse current because the resistance is low and the current is Inductance-limited, so i advice to use only 4 caps (maximum 5). Concerning the switching i used 2N6509 SCRs (Onsemi) (25A 800V) which have a pulse rating of 300A x 6 ms (450 x 1ms).
They are very good cheap and small and requires small signal to drive. A reverse diode was added to the caps because the simulations showed a peak reverse voltage in capacitors (it is an undamped LCR circuit) that could damage them. This solution limits reverse charging (to -0.5 V to 1V) and makes the current decay better reducing the such-back effect.
The projectile is a 2.5 mm diameter nail with the same lenght as the winding. but more longer pulse, so the additional energy may slow down the projectile instead of fastening it so I would advice to keep them only 4. I trusted the simulations and have almost broken a window with this thing ;-) fortunately the curtains slowed it down .
For first, you need some disposable camera flashes, so try to search at your local photo shop. You need 4 or more of them. Desolder the caps and collect them. They have ratings of 330V 120-160uF and can survive pulses up to 300A (each), or even dead shorts (but don't do it because it is quite a bang). Paralleling them reduces the ESR (internal resistance) and ESL and increases peak current capability. I used 4 of them, and my coil launcher has a pulse current of 400A (about 100A for cap). The more caps, the more energy. Concerning the charging circuit, use the largest you got, and try to use more batteries than originally if you want a fast charge. I used a max Kodak disposable flash, and it works fine with 4 1.5V batteries (originally it was designed to use one) and doesn't burn out. The caps were soldered on a small breadboard with parallel tracks made with lots of solder (otherwise the solder will blow).
The coil was made with 200 turns distributed on 10 layers (remember to insulate each other) of insulated magnet wire with 1mm diameter on a glass pipe with 6mm external diameter and 3mm internal diameter. Also, plastic works good as a barrel but must be hard; metals must be NON-Ferromagnetic and must have a cut along the barrel length (to limit eddy currents).
The resistance is 350 milliohm, and inductance is 165 uH (according to my LCR meter), giving a pulse length of 1 ms (Multisim simulation) and peak current of 400A, limited by inductance. Using more caps would increase pulse current because the resistance is low and the current is inductance-limited, so it is advised to use only 4 caps (maximum 5).
Concerning the switching, 2N6509 SCRs (Onsemi) (25A 800V) are used, which have a pulse rating of 300A x 6 ms (450 x 1ms). They are very good, cheap, and small and require a small signal to drive. A reverse diode was added to the caps because the simulations showed a peak reverse voltage in capacitors (it is an undamped LCR circuit) that could damage them. This solution limits reverse charging (to -0.5 V to 1V) and makes the current decay better, reducing the such-back effect. The projectile is a 2.5 mm diameter nail with the same length as the winding, but a longer pulse may slow down the projectile instead of speeding it up, so it is advised to keep them only 4. The simulations indicate a high potential for the device, with enough force to potentially break a window, though precautions should be taken to ensure safety during operation.
The schematic design should include the following components:
1. **Capacitor Bank**: Four parallel-connected electrolytic capacitors rated at 330V and 120-160uF.
2. **Coil**: A coil constructed with 200 turns of 1mm insulated magnet wire, wound around a glass pipe, ensuring insulation between layers.
3. **SCR**: A 2N6509 SCR for switching, with appropriate heat sinking to manage thermal dissipation.
4. **Diode**: A reverse diode across the capacitor bank to protect against reverse voltage.
5. **Power Source**: A battery pack capable of providing sufficient voltage and current for rapid charging of the capacitor bank.
The operational principle revolves around charging the capacitors quickly and discharging them through the coil to launch the projectile. The timing of the SCR's gating signal is critical, necessitating precise control to ensure maximum efficiency and safety. The system should be tested in a controlled environment, with safety measures in place to handle the high currents and potential hazards associated with magnetic projectile launching.This is a fun and non-dangeros project for those people who like to throw projectiles magnetically. It simply works by placing a ferromagnetic projectile at one end of a coil and pulsing some power in it. The trick is to switch off power when the projectile is at the middle of the coil, there are some ways to do it but it isn't important now.
The second trick is to use a coil as close as possible to projectile to waximize coupling and the third to avoid saturation, that means keeping the current not to high. I've been messing with coil launchers for a year. The first model was a straw with some wire wrapped on it and an electrolityc capacitor (200V) pulsed in it.
Lots of sparks and metal flying but was able to shoot a nail accross my room. I started esperimentation wrapping wire on glass and using more litycs charged by mains power, very bulky and disappointing (100J of energy where only able to blast through 2 sheets). After holydays I started more mature experimentation employing SCRs (solid state switching) photoflash electrolytics and optical sensors, and built a bi-coil launcher (2 stages), complicated but poweful ( blasted through a can) but the timing is critical, so transient simulations were a must (and a L-C-R meter).
The next launcher will be mosfet-switched with 3 coils and optical sensors, but i don't have the funds/parts yet to build such an expensive launcher, but already designed plans and models. For now i decided to build a small funny coil launcher using one scr and coil on glass. Using my LCR meter and multisim simulator i designed it for max efficiency. For first you need some disposable camera flashes, so try to search at your local photo shop. You need 4 of more of them. Desolder the caps and collect them. They have ratings of 330V 120-160uF and can survive pulses up to 300A (each), or even dead shorts (but don't do it because it is quite a bang).
Paralleling them reduces the ESR (internal resistance) and ESL and highers peak current capability. I used 4 of them and my coil launcher has a pulse current of 400A (about 100A for cap). The more caps , the more energy Concerning the charging circuit, use the largest you got, and try to use more batteries than originally if you want a fast charge. I used a max kodak disposable flash and it works fire with 4 1.5V batteries (originally it was designed to use one) and doesn't burn out.
The caps where soldered on a small breadboard with parallel tracks made with lots of solder (otherwise the solder will blow). The coil was made with 200 turns distributed on 10 layers (rembember to insulate eachover) of insulated magnet wire with 1mm diameter on a glass pipe with 6 mm external diameter and 3 mm internal diameter.
Also plastic works good as barrel but must be hard , metals must be NON-Ferromagnetic and must have a cut along the barrel lenght (to limit eddy currents). The resistance is 350 milliohm and inductance is 165 uH (according to my LCR meter) giving a pulse lenght of 1 ms (Multisim simulation) and peak current of 400A, limited by inductance.
Using more caps would increase pulse current because the resistance is low and the current is Inductance-limited, so i advice to use only 4 caps (maximum 5). Concerning the switching i used 2N6509 SCRs (Onsemi) (25A 800V) which have a pulse rating of 300A x 6 ms (450 x 1ms).
They are very good cheap and small and requires small signal to drive. A reverse diode was added to the caps because the simulations showed a peak reverse voltage in capacitors (it is an undamped LCR circuit) that could damage them. This solution limits reverse charging (to -0.5 V to 1V) and makes the current decay better reducing the such-back effect.
The projectile is a 2.5 mm diameter nail with the same lenght as the winding. but more longer pulse, so the additional energy may slow down the projectile instead of fastening it so I would advice to keep them only 4. I trusted the simulations and have almost broken a window with this thing ;-) fortunately the curtains slowed it down .

Electromagnetic Ring Launcher Circuit
The electromagnetic ring launcher consists of four subcircuits: a clock circuit utilizing U5, a 555 oscillator/timer configured for astable operation; a countdown/display circuit incorporating U3, a 74190 synchronous up/down counter with BCD outputs set for countdown operation; U4, an ECG8368...

how to convert a 9v battery to 3.7v
A regulator circuit is needed for this DIY project. Familiarity with electronic components, circuitry, the use of a multitester, and a soldering iron is essential. The schematic diagram provided can accept an input voltage ranging from 6 to 24 volts...

turret diy
For maximum mini-security, this RC Tupperware Turret delivers a formidable deterrent against food theft. While it lacks motion sensors, potential food thieves will think twice before attempting to swipe baked goods. This 11-hour project, designed by Chris of PyroElectro, emphasizes...

MePADS
If you are considering building the Desert Ratt 2, it is advisable to read all the accompanying text, as it contains relevant construction details. Engaging with the comments and replies can also provide additional insights, as previous blog posts have...

Making Electromagnetic Weapons
This series focuses on creating Electromagnetic Weapons, specifically highlighting the Electromagnetic Pulse Generator. The last three articles provide further insights. Microwaves, commonly encountered in everyday life, utilize invisible energy to heat food, and can even produce sparks when metal is...

Homemade Metal Detector Kit
A simple home project can quickly become problematic if it encounters electric cables, gas, or water pipes, or the central heating system. Using a metal detector allows one to check for metal objects within walls, ceilings, or floors beforehand. An...
Glue stck torch
This project, developed around 2005, involves constructing a torch using a glue stick, which conveniently accommodates an AA battery within its plastic casing. To create a functional battery holder, contacts for both the positive and negative connections are necessary. The...
DIY kinetic energy harvester
A DIY kinetic energy harvester utilizing the electromagnetic method to generate electricity. The materials that will be used are currently known.
The project involves creating a kinetic energy harvester that converts mechanical energy from motion into electrical energy through electromagnetic induction....
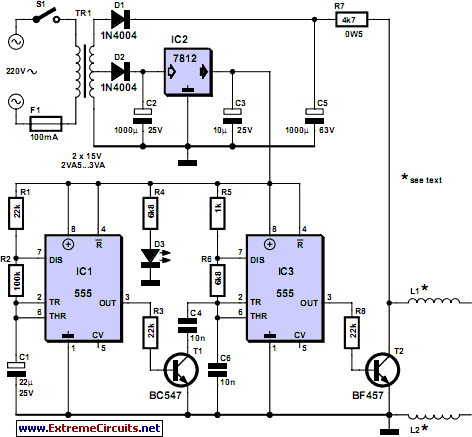
pipe descaler schematics
For many years, magnetic (or electromagnetic) water descaler devices have appeared on the shelves of home improvement and DIY stores across Europe. Despite numerous studies conducted by manufacturers and various consumer associations, none have definitively concluded on the effectiveness of...